Create a React Chrome Extension Filtering YouTube Videos By Narrower Durations

In this article, we will be going over how to create a chrome extension in react to enhance filter youtube video results using facebooks create-react-app tool
In this article, we will be going over how to create a chrome extension in react using Facebook's create-react-app tool, which will give us bundling capabilities. This means that you will be able to npm install your favorite node modules and use them to develop your chrome extensions. We will be injecting our code right into a page and have access to its document.
We'll make our extension provide a custom menu item that appears when we right click on a web page. Our focus will be on a youtube's videos page through search results. When we're viewing videos through search results, our extension will constantly remove videos from the results where the duration of the video is either less than a given minimum duration or higher than a given maximum duration. So when we're constantly scrolling down and youtube is constantly feeding us new videos, our extension will constantly remove videos we don't want to see :)
You might ask "what's the point?" when youtube already gives us a filter for duration. This is true but they only let users filter durations less than 4 minutes or higher than 20 minutes. I don't know about you, but I think it is incredibly powerful to filter something more narrow such as filtering videos with a duration between 8 and 15 minutes, vice versa.
What if we only want to see videos with a duration between 5 and 10 minutes from the True Crime channel? Filtering videos shorter than 4 minutes or longer than 20 minutes is completely useless. We want to see videos that are between 5 and 10 minutes when we are looking for episodes that are split into parts like part 1 of 4, part 2, part 3, etc because these videos usually have a duration of 6 minutes on average. When we're looking through our search results we don't want to be bombarded with 40 minute podcast videos.
We will also create an options page as well as a popup window when clicking on its icon in the toolbar just to see how simple it can be.
(If you want the link to the GitHub repo you can click here)
This post will not go over how chrome extensions work, so with that in mind before reading further I recommend to go over their overview to have a basic understanding required to understand the rest of this tutorial.
And last but not least, by the end of this tutorial you'll probably notice that what we'll be building in this post doesn't even need react. But the main point is to show how react can be implemented to get you started on your own.
Without further ado, let's begin!
Our code structure
In general when we create chrome extensions we separate our content scripts code away from the background scripts. Because of this, it requires a couple of additional steps to develop our code in two separate code bases if we want to retain the benefits of code bundling and other goodies you'd find in modern projects that utilize bundlers.
We will also be injecting our react components right into a web page so we'll have access to its document body object so that we can manipulate the DOM.
Create the project
The first thing we are going to do is create a create-react-app project. We're going to need to give our new project a name, and in this tutorial we are going to name our project "react-chrome-ext".
Let's enter this in the terminal:
npx create-react-app react-chrome-extNow enter the directory after it's done:
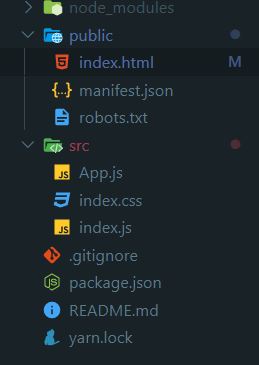
cd react-chrome-extThe first thing we are going to do is to get rid of the things we don't need for this tutorial. Here is our project directory after the cleanup:
We need to provide a way for our extension to get access to a current tab's document when our extension is being used. Our react components most likely won't have this kind of access yet because it's being injected into an element with the id root as we can see when we open up index.js:
import React from 'react'
import ReactDOM from 'react-dom'
import './index.css'
import App from './App'

ReactDOM.render(<App />, document.getElementById('root'))
If we leave it as is then our extension will only be able to work when a web page has an actual DOM element with an id 'root'. We're going to reverse this a little by injecting our own element into the document.body before executing ReactDOM.render.
To do this, we'll create an element and append it to the document.body:
import React from 'react'
import ReactDOM from 'react-dom'
import './index.css'
import App from './App'

const rootEl = document.createElement('div')
rootEl.id = 'react-chrome-ext'
document.body.appendChild(rootEl)

ReactDOM.render(<App />, rootEl)
Now we're going to go inside the App component and this will is where we'll begin implementing our custom code logic for our extension (Note: This is bascailly our content script).
Remember, we are making this extension for a youtube's list of videos from using their search feature. So when we're on the page we want to be able to right click the page to pop open the context menu, and inside will be our custom menu item we can click on to invoke the filterer. We want our content scripts to listen for the click event so that we can invoke the filterer, and for that we need to register the context menu through the background scripts and attach the click event listener there. When the callback invokes, we will use the chrome message api to send the signal to the content scripts. Since we added a listener on the content side for messages, that's how it will detect the click action.
In App.js we're going to put the listeners on a React.useEffect like so:
import React from 'react'

function App() {
  React.useEffect(() => {
    // Register the message listener on load
    // eslint-disable-next-line
    chrome.runtime.onMessage.addListener((action) => {
      switch (action.type) {
        case 'filter-by-duration': {
          console.log('received click event from context menu')
          break
        }
        default:
          break
      }
    })
  }, [])

  return null
}

export default App
chrome.runtime.onMessage listens for any message coming from our background script.
Next, we're going to create a directory called bg in the src directory, and create a background.js file in it like so:
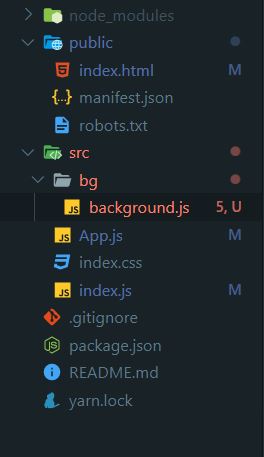
This is where we'll have to implement code for the extension to register menu items to the context menu upon installation as well as what happens when its clicked on:
// Install menu items to the context menu when the extension is installed
chrome.runtime.onInstalled.addListener((message) => {
  const contexts = [
    'page',
    'selection',
    'link',
    'editable',
    'image',
    'video',
    'audio',
  ]
  // Clicking this item will send an event to the content script listening to messages
  chrome.contextMenus.create({
    title: 'Filter by duration',
    id: 'filter-by-duration',
    contexts: [...contexts, 'browser_action'],
  })
})

function getActiveTab(callback) {
  chrome.tabs.query({ active: true, currentWindow: true }, (tabs) => {
    const activeTab = tabs[0]
    callback(activeTab)
  })
}

// When a context menu item is clicked
chrome.contextMenus.onClicked.addListener((info) => {
  console.log(info)
  if (info.menuItemId === 'filter-by-duration') {
    getActiveTab((tab) => {
      if (info.menuItemId === 'filter-by-duration') {
        chrome.tabs.sendMessage(tab.id, {
          type: 'filter-by-duration',
          ...info,
        })
      }
    })
  }
})
The chrome.runtime.onInstalled.addListener((message) => { line registers our callback to call whenever the extension is installed. This is where we create the context menu as we can see here:
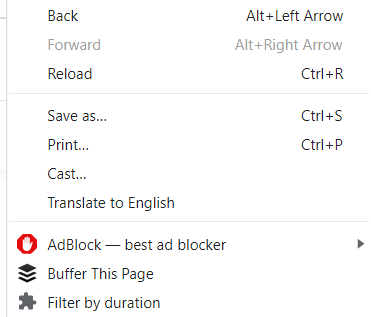
// Clicking this item will send an event to the content script listening to messages
chrome.contextMenus.create({
  title: 'Filter by duration',
  id: 'filter-by-duration',
  contexts: [...contexts, 'browser_action'],
})
That piece of code will later create this menu item (at the bottom):
We created a getActiveTab helper function so that we can reuse for additional actions in the future. It simply calls the callback you pass to it passes and gives you an object that represents the current tab you're on.
And finally, we added the handler to handle the click event when the menu item is clicked as we can see below:
// When a context menu item is clicked
chrome.contextMenus.onClicked.addListener((info) => {
  console.log(info)
  if (info.menuItemId === 'filter-by-duration') {
    getActiveTab((tab) => {
      if (info.menuItemId === 'filter-by-duration') {
        chrome.tabs.sendMessage(tab.id, {
          type: 'filter-by-duration',
          ...info,
        })
      }
    })
  }
})
The important part to look at is this:
chrome.tabs.sendMessage(tab.id, {
  type: 'filter-by-duration',
  ...info,
})
This sends the event to the content scripts (which our App component will then receive).
That explains why we had the chrome.runtime.onMessage.addListener line in the App component:
import React from 'react'

function App() {
  React.useEffect(() => {
    // Register the message listener on load
    // eslint-disable-next-line
    chrome.runtime.onMessage.addListener((action) => {
      switch (action.type) {
        case 'filter-by-duration': {
          console.log('received click event from context menu')
          break
        }
        default:
          break
      }
    })
  }, [])

  return null
}

export default App
Now we're going to add the logic to filter videos by duration inside the switch statement. We won't be coding the extra goodies that you'd eventually want to implement such as providing a way to change the filter's duration value when viewing the tab on demand because that is for you to do. So for the sake of this tutorial we're going to just hardcode the duration.
Before we continue go to YouTube and search for something. For this tutorial we'll just search road rage. Here's what we get:
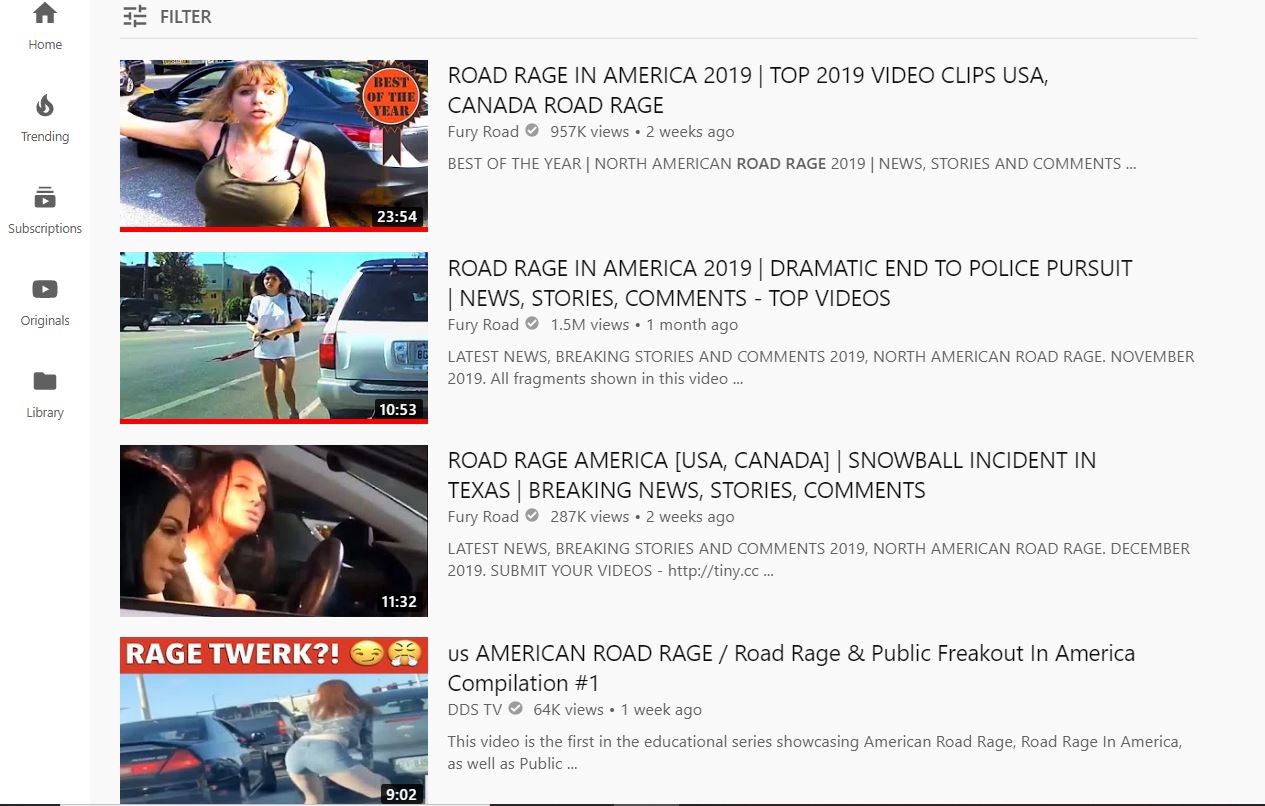
We'll hardcode a minimum duration of 10 minutes and a maximum of 15 minutes in our filterer, so by looking at the screenshot when we use the filterer we shouldn't be able to see the first video (23:42) and the fourth video (9:02).
To achieve this we have to query and traverse the page's document object. If you right click the page and go to Inspect Element you can figure out how to target the elements you need by using selectors like document.querySelector (Or you can copy my snippet below). We need to target the element that displays the video's duration and turn it into a number (since they're strings) so that we can apply math operations to achieve our goal.
Lets go ahead and implement the filterer now:
const convertToMs = (ms, type) => {
  switch (type) {
    case 'seconds':
      return ms * 1000
    case 'minutes':
      return ms * 60000
    case 'hours':
      return ms * 36000000
    default:
      break
  }
}

function filterByDuration(duration) {
  return () => {
    const container = document.querySelector(
      '#contents.style-scope.ytd-item-section-renderer',
    )
    const elemsList = container.querySelectorAll('ytd-video-renderer')
    elemsList.forEach((elem) => {
      const durationElem = elem.querySelector(
        'span.style-scope.ytd-thumbnail-overlay-time-status-renderer',
      )
      if (durationElem) {
        // The value here will be strings like: "10:42", "01:19", "12:01:30", etc
        let durationTime = durationElem.innerText.trim()
        const durationParts = durationTime.split(':')
        let hour = 0
        let min = 0
        let sec = 0
        switch (durationParts.length) {
          case 2:
            min = Number(durationParts[0])
            sec = Number(durationParts[1])
            break
          case 3:
            hour = Number(durationParts[0])
            min = Number(durationParts[1])
            sec = Number(durationParts[3])
            break
          default:
            break
        }
        let currentDurationInMs = convertToMs(hour, 'hours')
        currentDurationInMs += convertToMs(min, 'minutes')
        currentDurationInMs += convertToMs(sec, 'seconds')
        const minMs = convertToMs(duration.min, 'minutes')
        const maxMs = convertToMs(duration.max, 'minutes')
        if (currentDurationInMs < minMs || currentDurationInMs > maxMs) {
          elem.parentNode.removeChild(elem)
        }
      }
    })
  }
}

React.useEffect(() => {
  // Register the message listener on load
  // eslint-disable-next-line
  chrome.runtime.onMessage.addListener((action) => {
    switch (action.type) {
      case 'filter-by-duration': {
        const filter = filterByDuration({ min: 10, max: 15 })
        // Invoke it once as soon as the context menu is clicked so that we don't have to wait
        //    for a scroll event to happen in order for the removal of elements to start happening
        filter()
        // Add it to the scroll event so that we can forever get these videos out of our sight when scrolling down
        window.addEventListener('scroll', filter)
        break
      }
      default:
        break
    }
  })
}, [])
This should be enough code for our extension to work however we need to do a couple more things before we load up our extension on chrome.
One thing we're going to want to do is to get rid of the eslint error that complains when chrome is not defined. We can get around that by adding webextensions: true to our eslintConfig property inside package.json:
"eslintConfig": {
    "extends": "react-app",
    "env": {
      "webextensions": true
    }
  }
Next we're going to have to edit our manifest.json file in our public directory. When we build our project, this manifest.json file gets copied over to the build directory which is the directory you will be loading into chrome. Lets clean it up a bit so that chrome can understand our extension:
{
  "manifest_version": 2,
  "version": "1.0.1",
  "name": "React Chrome Extension",
  "content_security_policy": "script-src 'self' 'sha256-xr+HqUtnq8KF3IBn+TQ37Vz0elxg11bPYmNJy5M/p38='; object-src 'self'",
  "background": {
    "scripts": ["background.js"],
    "persistent": false
  },
  "permissions": ["activeTab", "tabs", "contextMenus"]
}
We also need to specify a content_scripts property in the manifest if we want chrome to pick them up. Typically this is where we input our content scripts like our App.js file, but the problem here is that chrome won't understand untranspiled react code. So we need to insert the transpiled output files that get sent to the build folder when we run npm run build.
Lets go ahead and run npm run build. Our build folder will end up looking something like this:
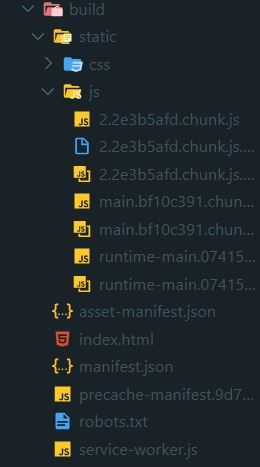
The javascript files we want to include in the manifest are these three files:
static/js/2.2e3b5afd.chunk.jsstatic/js/main.bf10c391.chunk.jsstatic/js/runtime-main.0741577f.js
...which ends up looking like this:
{
  "manifest_version": 2,
  "version": "1.0.1",
  "name": "React Chrome Extension",
  "content_security_policy": "script-src 'self' 'sha256-xr+HqUtnq8KF3IBn+TQ37Vz0elxg11bPYmNJy5M/p38='; object-src 'self'",
  "background": {
    "scripts": ["background.js"],
    "persistent": false
  },
  "content_scripts": [
    {
      "matches": ["<all_urls>"],
      "js": [
        "/static/js/2.2e3b5afd.chunk.js",
        "/static/js/main.bf10c391.chunk.js",
        "/static/js/runtime-main.0741577f.js"
      ]
    }
  ],
  "permissions": ["activeTab", "tabs", "contextMenus"]
}
This is fine, but now our problem is that everytime we run npm run build the file name to those javascript files change which means we have to manually change these lines to stay up to date with the dynamic updates to the file name. This is a poor development experience so we're going to have to get around that by ejecting our project to gain control over how the output gets generated.
Go ahead and run npm run eject
After that's done, go to your config folder and open up webpack.config.js
Do a search for .[hash:8] and remove both occurrences.
The first one is name: 'static/media/[name].[hash:8].[ext]', so change it to name: 'static/media/[name].[ext]', and do the same for the other one.
Now do another search and look for .[contenthash:8] and delete all occurences of those as well. Your js files will now have the same file name whenever you run the build command.
So now when you run npm run build those output files stay the same every time:
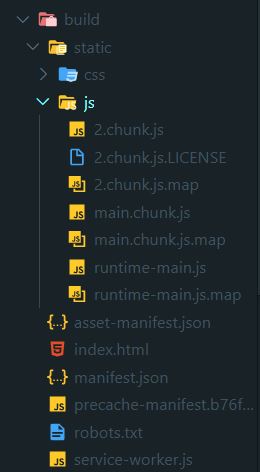
You can now safely enter these into your manifest.json:
{
  "manifest_version": 2,
  "version": "1.0.1",
  "name": "React Chrome Extension",
  "content_security_policy": "script-src 'self' 'sha256-xr+HqUtnq8KF3IBn+TQ37Vz0elxg11bPYmNJy5M/p38='; object-src 'self'",
  "background": {
    "scripts": ["background.js"],
    "persistent": false
  },
  "content_scripts": [
    {
      "matches": ["<all_urls>"],
      "js": [
        "/static/js/2.chunk.js",
        "/static/js/main.chunk.js",
        "/static/js/runtime-main.js"
      ]
    }
  ],
  "permissions": ["activeTab", "tabs", "contextMenus"]
}
Great! Now run npm run build and lets load this up into chrome. Type in chrome:extensions to your address bar, then click the "Load unpacked" button and select your build directory.
Your extension should now be loaded!
Lets go to www.youtube.com and search for "road rage". Right click on the page and click "Filter by duration". After clicking on that, the extension should now remove the elements from the screen according to your duration filter! Hurray!
Remember in one of our earlier screenshots we had a couple of video results and we mentioned that the video duration of 23:54 and 9:42 shouldn't be showing when our filter is applied?
Lets see if that is true:

Hurray!
Before we end this tutorial lets go ahead and implement an options page as well as a popup.
The options page is used when you right click your extension's icon in the toolbar and clicking the options item.
The popup is similarly used when you left click your extension's icon in the toolbar.
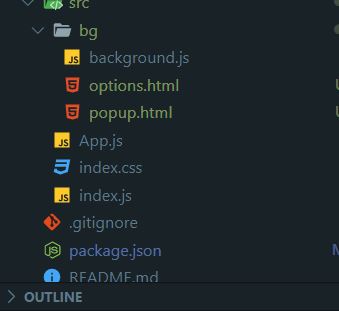
We can just create an options.html and popup.html in src/bg/ like below:
Then we can enter in a postbuild script to our package.json that automatically runs after building finishes:
"scripts": {
    "start": "node scripts/start.js",
    "prebuild": "rm -rf build",
    "build": "node scripts/build.js",
    "postbuild": "cp src/bg/* build"
}
Conclusion
And that concludes the end of this post! I hope you found this to be valuable and look out for more in the future!