The Power of MutationObserver in JavaScript
April 23rd, 2021

Share This Post
In modern programming there is plenty involvement and discussion about what is known as state, which is most commonly revolved around user interactivity. The MutationObserver is a powerful API that can help us with this because we can use it to react to user interactivity. It is what replaced the legacy Mutation Events API from the DOM3 Events specification.
To create a MutationObserver we need to instantiate it with the new keyword along with a callback like so:
const observer = new MutationObserver(function onMutation(mutations, observer) {
  console.log('Mutations', mutations)
})
The onMutation callback receives two arguments as stated below (in order):
- Mutations - A list of MutationRecord objects
- Observer - The
MutationObserverthat was contructed. In our most recent example it is theobservervariable.
The onMutation callback is invoked every time there is a change or mutation with the DOM nodes that were registered with the observe method.
The observe method takes in a DOM element to "listen" to as its first argument, and an object of options as its second argument:
const container = document.getElementById('root')
const options = { childList: true }

observer.observe(container, options)
Whenever there are any changes to the DOM node the callback is invoked and receives a list of MutationRecord objects as its first argument that contains the type of mutation that occurred and additional information on what happened. It is through these record objects that we can use to develop neat improvements to user experience.
For example we can start observing an element and get notified whenever we add, remove, or even replace children with other children, but we have to ask for that information by passing childList: true in the options argument:
const observer = new MutationObserver(function onMutation(mutations, observer) {
  console.log('Mutations', mutations)
})

observer.observe(root, {
  childList: true,
})

const textarea = document.createElement('textarea')
const select = document.createElement('select')
root.appendChild(textarea)
root.replaceChild(select, textarea)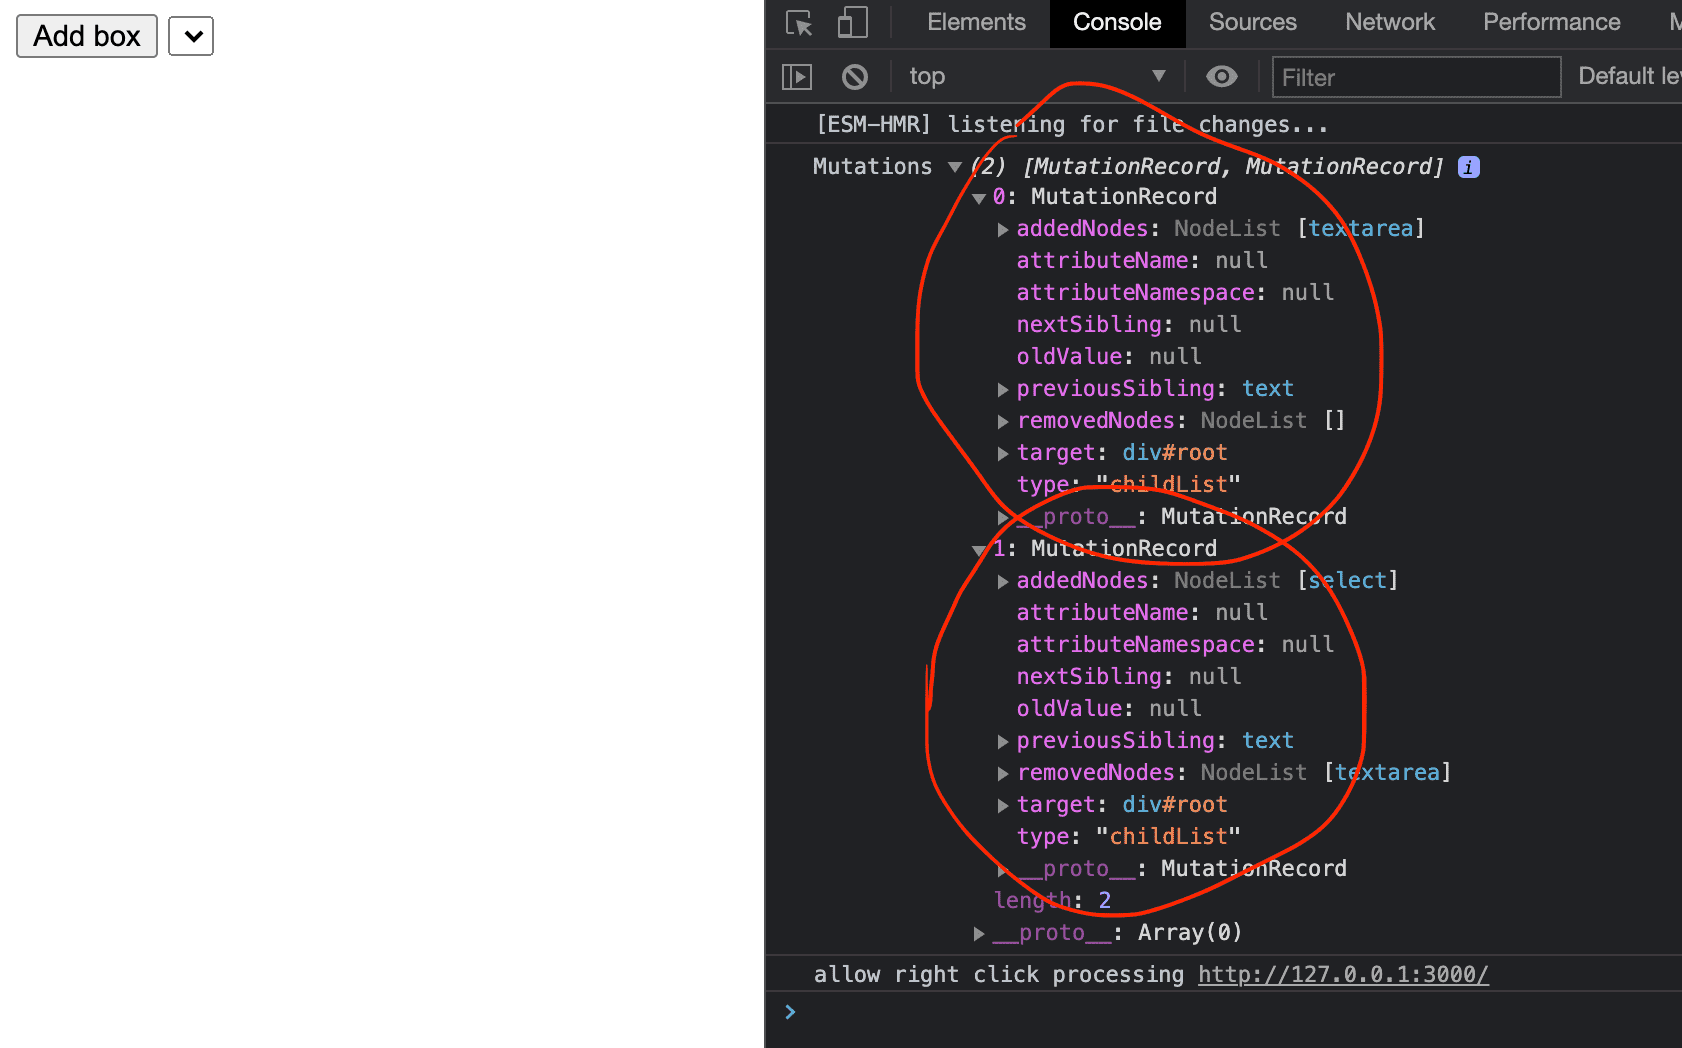
We can ask for other information as well. Here is a full list of options we can pass in:
const observer = new MutationObserver(function onMutation(mutations, observer) {
  console.log('Mutations', mutations)
})

observer.observe(root, {
  attributes: true,
  attributeOldValue: true,
  attributeFilter: [],
  childList: true,
  characterData: true,
  characterDataOldValue: true,
  subtree: false,
})
When we ask for attributes and an attribute's value was changed, we're able to observe the previous value before it was changed by passing in attributeOldValue: true like so:
observer.observe(root, {
  attributes: true,
  attributeOldValue: true,
})

root.style.visibility = 'hidden'
root.style.visibility = 'visible'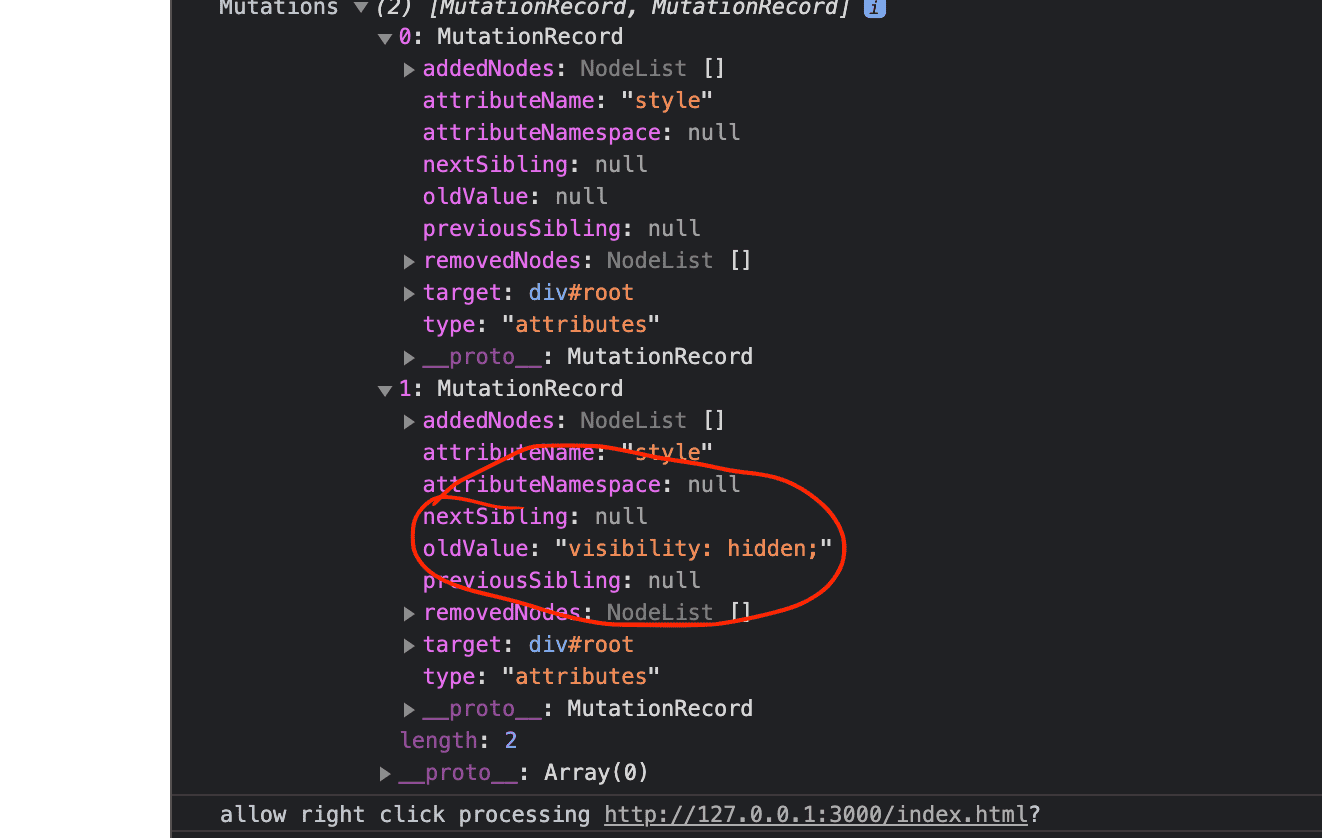
The attributeFilter option is used to filter away the mutations we don't care about. Logically, the larger the app is the more this becomes desirable otherwise we can quickly end up with a bunch of invocations for changes that we most likely are never going to associate with in that observer:
root.hidden = true
root.hidden = false

root.id = 'myid123'
root.id = 'yourid345'

root.title = 'root-document'
root.title = 'Root document'

root.onclick = () => {}

root.tabIndex = 1
root.option = 'f'

const someHttpRequest = async () => {
  const res = await fetch('https://www.google.com')
  return res.text()
}

someHttpRequest().then((text) => {
  const span = document.createElement('span')
  span.innerHTML += text.substring(0, 100)
  root.dataset.something = span.innerHTML
  root.style.backgroundColor = 'red'
})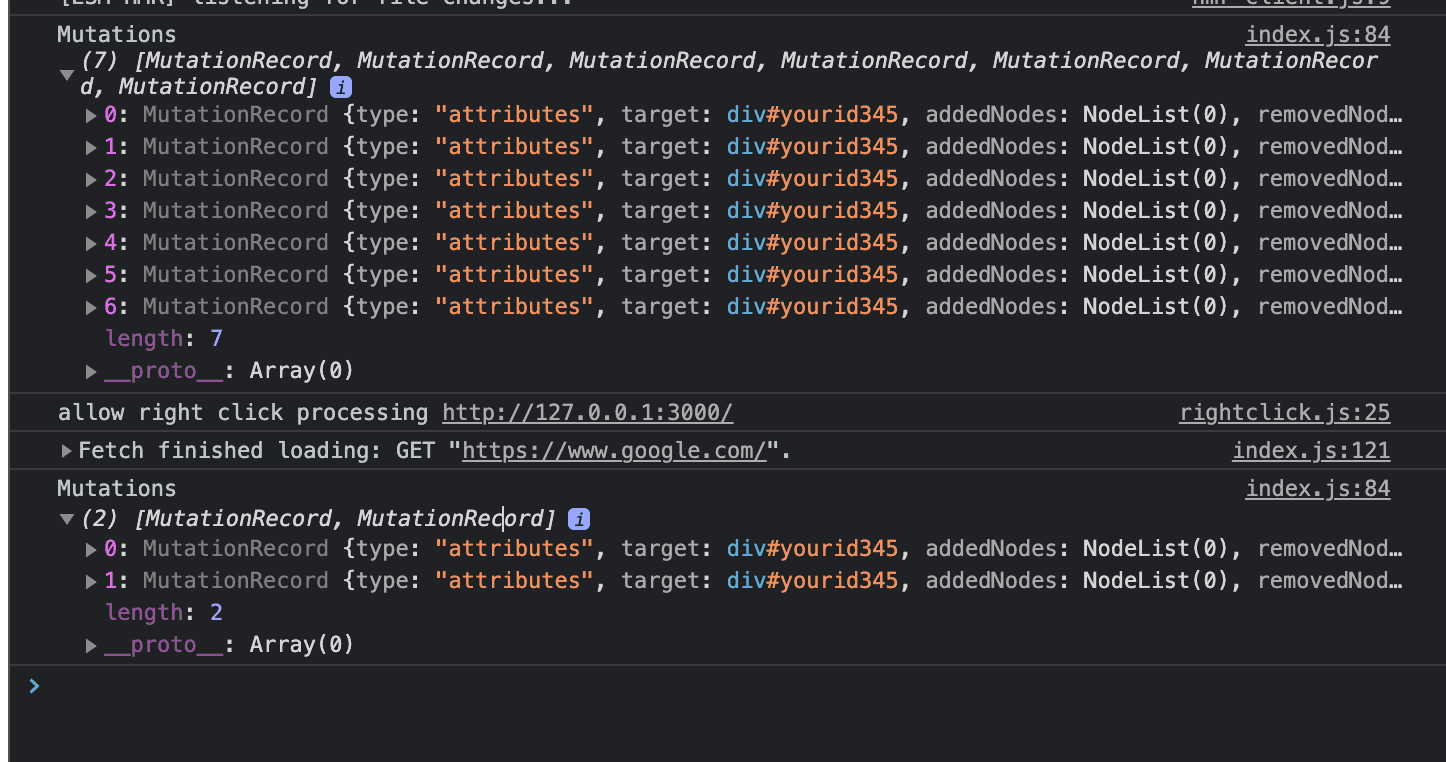
If we only care about receiving notifications when hidden and title changes, we can put that in the filter option:
observer.observe(root, {
  attributes: true,
  attributeOldValue: true,
  attributeFilter: ['hidden', 'title'],
})
This reduces the results and we won't have to filter it in the callback implementation (which will bloat the function block and make our code harder to maintain in the future):
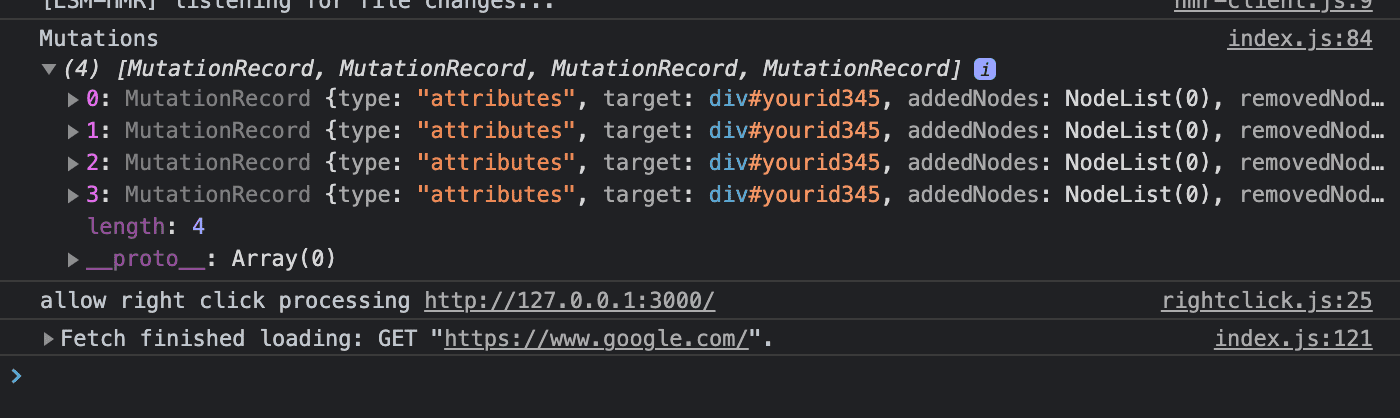
When we set subtree: true in options, we'll get notified of the changes that occur to all of the descendants of the observed element:
observer.observe(root, {
  attributes: true,
  attributeOldValue: true,
  subtree: true,
})someHttpRequest().then((text) => {
const span = document.createElement('span')
span.innerHTML += text.substring(0, 100)
root.dataset.something = span.innerHTML
root.style.backgroundColor = 'red'
})
const form = document.createElement('form')
const input = document.createElement('input')
const select = document.createElement('select')
root.appendChild(form)
form.appendChild(input)
form.appendChild(select)
const options = ['100', '200', '300']
options.forEach((value) => {
const option = document.createElement('option')
select.appendChild(option)
option.text = value
option.value = value
option.style.color = 'red'
option.style.position = 'relative'
})
select.selectedIndex = 0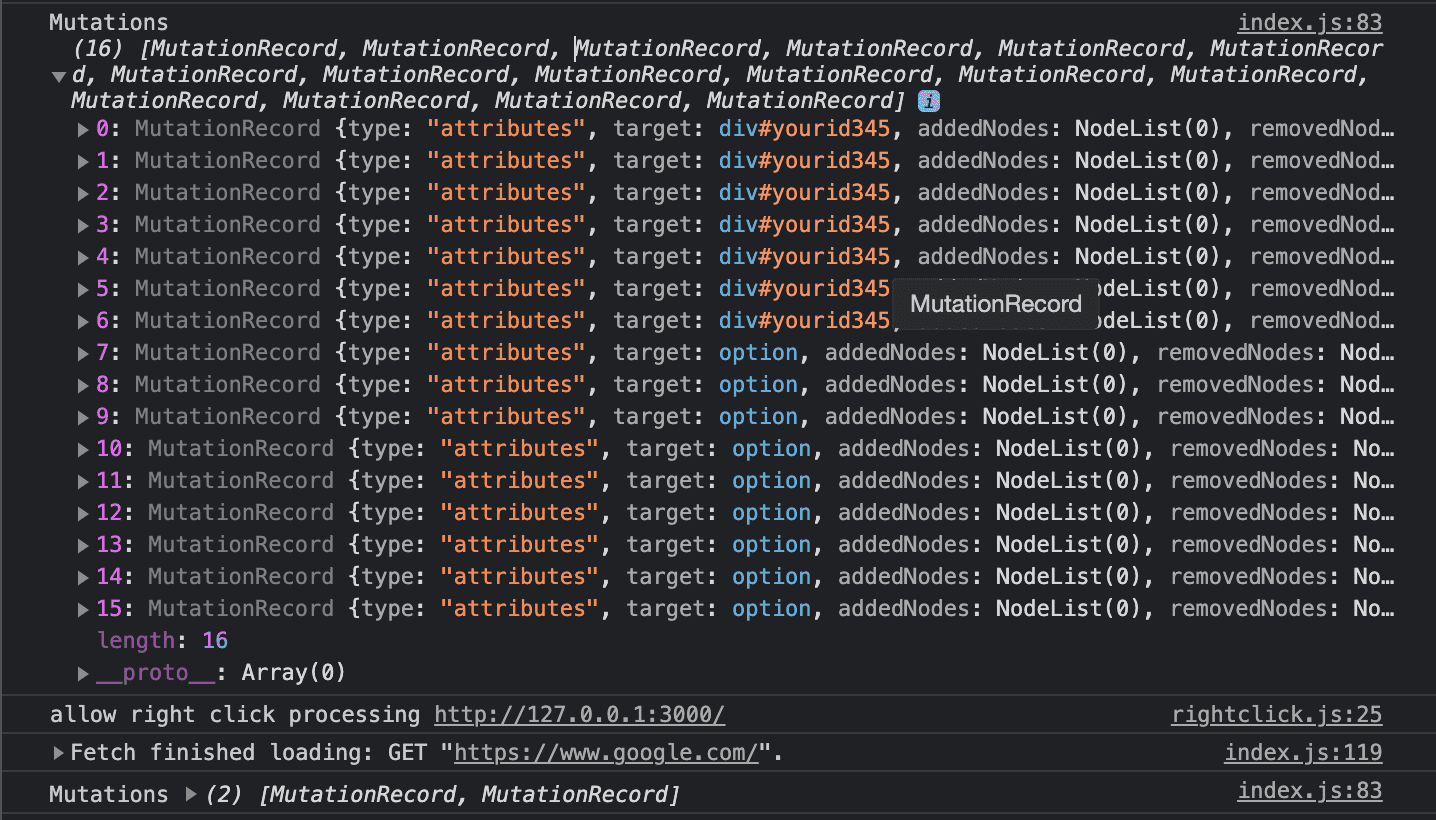
If we set characterData to true, we can get notified to changes of text content inside elements like so:
observer.observe(root, {
  characterData: true,
  characterDataOldValue: true,
  subtree: true,
})

const root = document.createElement('root')
const form = document.createElement('form')
const select = document.createElement('select')
const selectLabel = document.createTextNode('Select an option')
const br = document.createElement('br')
const label = document.createElement('label')

label.appendChild(selectLabel)
root.appendChild(form)
form.append(br)
form.appendChild(selectLabel)
form.appendChild(select)

const options = ['100', '200', '300']
options.forEach((value) => {
  const option = document.createElement('option')
  select.appendChild(option)
  option.value = value
  option.text = value
  option.style.color = 'red'
  option.style.position = 'relative'
})
select.selectedIndex = 0
select.onchange = (e) => (selectLabel.data = `You selected:  ${e.target.value}`)
Now, selecting options will call our callback on the observer:
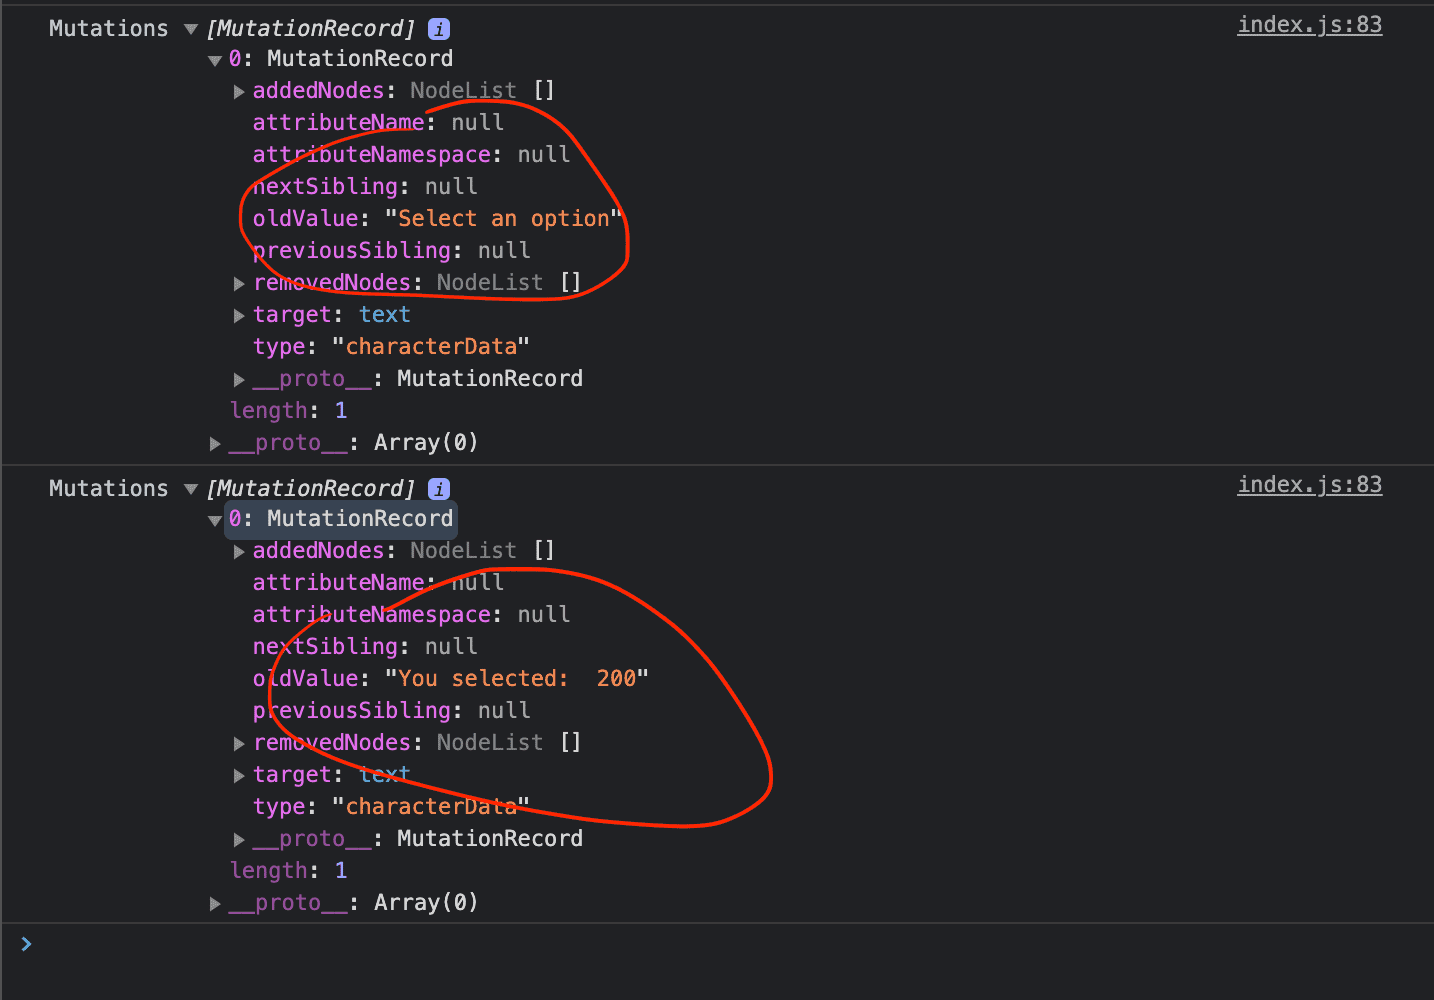
Note: The characterData option will only notify us when text content changes on a Text node.
So instead of this:
const elem = document.createElement('div')
root.appendChild(elem)
elem.innerHTML = ''
elem.innerHTML = 'hello'
We have to create a Text node and set its text on its data, which triggers the callback:
const elem = document.createElement('div')
const textNode = document.createTextNode('')
elem.appendChild(textNode)
root.appendChild(elem)
textNode.data = 'hello'
Now that you have a basic understanding of how the MutationObserver works, lets quickly build something that uses it to enhance user experience!
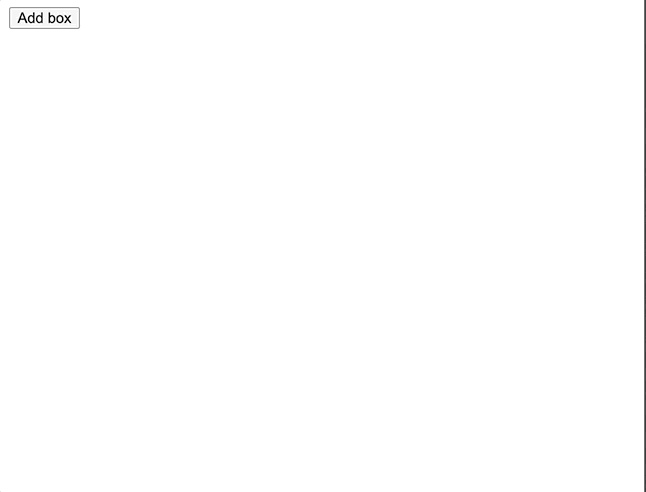
Lets say we are building a page that lets users customize their profile page. We give them an option to add boxes to decide the visual structure, and this is what it looks like:

I'm going to reveal the stylesheet, the DOM structure and the JavaScript (the MutationObserver is not in the code yet):
Style sheet:
.grid {
  display: flex;
}

.grid-item {
  flex-grow: 1;
  background-color: rgba(0, 0, 0, 0.2);
  margin: 3px;
  padding: 2px;
  border-radius: 5px;
  height: 150px;
  border: 1px solid rgba(50, 20, 255, 0.8);
}
Html:
<div id="root">
  <div class="grid"></div>
  <button id="add">Add box</button>
</div>
JavaScript:
const grids = []
const root = document.getElementById('root')
const addBtn = document.getElementById('add')

function createGrid() {
  const grid = document.createElement('div')
  root.appendChild(grid)
  grid.classList.add('grid')
  grids.push(grid)
  return grid
}

function createGridBox(tagName, attrs) {
  const elem = document.createElement(tagName)
  elem.classList.add('grid-item')
  if (attrs !== null && typeof attr === 'object') {
    Object.entries(attrs).forEach(([attr, value]) => {
      if (attr === 'style') {
        Object.entries(value).forEach(([styleKey, styleValue]) => {
          elem.style[styleKey] = styleValue
        })
      } else {
        elem[attr] = value
      }
    })
  }
  return elem
}

function getMostRecentGrid() {
  if (grids.length === 1) return grids[0]
  if (grids.length > 1) return grids[grids.length - 1]
  return null
}

addBtn.addEventListener('click', function onClick(e) {
  let box = createGridBox('div')
  let grid = getMostRecentGrid() || createGrid()

  if (grid.children.length >= 3) {
    grid = createGrid()
  }

  grid.appendChild(box)
})
Now when we click the button and the boxes appear, we feel a little confused on where to start or maybe even feel a bit lost on which box we should focus on. We can fix that by adding a highlight to the most recent box to signal the user that they should look at the box that they just added. Later on we can add controls like inputs, select, etc like a normal app would.
To highlight the most recent box means to signal to the user that the most recent box is the active one, guiding the user to it instead of looking at every box and feeling lost as to where to start:
We can easily use a MutationObserver to dynamically highlight (and even unhighlight) boxes as they are being added to the page.
So we can add onto the previous example to take it a step further to improve a better user experience thanks to the MutationObserver api.
First lets add the class name style for the active box:
.focused-grid-item {
  border: 1px solid magenta;
}
Next, we can create some helper functions to add/remove the class name to boxes as they are added:
const isActive = (elem) => elem.classList.contains('focused-grid-item')
const highlight = (elem) =>
  !isActive(elem) && elem.classList.add('focused-grid-item')
const unhighlight = (elem) =>
  isActive(elem) && elem.classList.remove('focused-grid-item')
Now here comes the MutationObserver to the rescue!
const observer = new MutationObserver(function onMutation(mutations, observer) {
  const lastMutation =
    mutations.length > 1 ? mutations[mutations.length - 1] : mutations[0]

  const { addedNodes, previousSibling, target } = lastMutation

  if (previousSibling) {
    unhighlight(addedNodes.item(0).previousElementSibling)
    highlight(addedNodes.item(0))
  } else {
    if (
      target.previousElementSibling &&
      target.previousElementSibling.lastElementChild
    ) {
      unhighlight(target.previousElementSibling.lastElementChild)
    }
    highlight(addedNodes.item(0))
  }
})

const options = { childList: true, subtree: true }
observer.observe(root, options)
In the callback it takes the last mutation that occurs so that we have access to the most recent element. This is all we need from the MutationRecord because it contains a target property that takes us straight to the DOM element. This DOM element contains the previousSibling which we need access to in order to remove the focused style from it.
Let's now go over the returned api that the call to new MutationObserver returns to us inside our observer variable:
const observer = new MutationObserver(function onMutation(mutations, observer) {...})The MutationObserver returns 3 methods that the observer can use. We already went over the observe method:
disconnect()observe()takeRecords()
The disconnect method removes observer from receiving further notifications from mutations. This means it will be silent for the rest of the lifespan of the app until observe is called on another DOM element to receive notifications again.
The takeRecords method takes all of the rest of the mutations (a list of MutationRecord instances) and returns them as an array.
Conclusion
The MutationObserver is a powerful api that encapsulates the MutationEvent api which is now deprecated.
With the MutationObserver it makes it easier to work with the DOM and react to changes that occur on demand. This makes it a great companion to develop web extensions for browsers like Google Chrome.
And this concludes the end of this post! I hope you found this to be valuable and look out for more in the future!